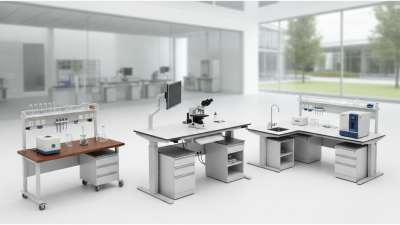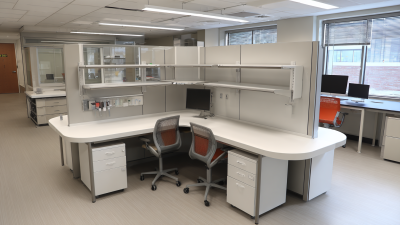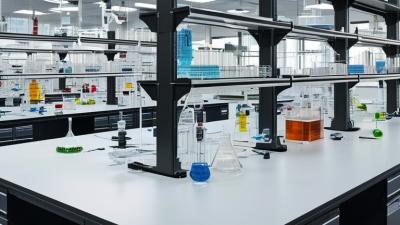
A Lab Workbench is more than a flat surface. It supports careful work, stores essential equipment, and helps keep daily tasks organized. The right choice depends on what happens in your space, from routine sample preparation to instrument use. A bench that looks sturdy in a catalog may still feel cramped once a microscope, balance, and reagent bottles share its surface.
Small details matter. Consider the bench’s dimensions, load capacity, and resistance to the chemicals used in your workflow. Check whether the work surface can be cleaned easily and whether drawers or shelves leave enough room for knees and footrests. If the bench needs sinks, power outlets, or gas connections, plan their locations before installation. These choices can affect comfort, maintenance, and future changes to the room.
There is no single best design for every laboratory. A teaching lab, a testing facility, and a research workspace may need different materials and layouts. Even within one room, users can have competing preferences. That deserves a second look. This guide presents ten practical tips for choosing a Lab Workbench, with attention to safety, ergonomics, durability, and budget. It also highlights questions worth asking suppliers, such as how surfaces perform under real cleaning routines and what support is available after purchase. Specifications help, but they do not answer everything. Match them to your actual tasks before deciding.

Define the work before choosing the bench. List each task, from weighing samples and pipetting to cleaning glassware or operating a centrifuge. Note the equipment’s footprint, weight, heat output, and required utilities. A balance needs a stable, vibration-resistant surface; a frequently used microscope needs comfortable viewing height and clear elbow space. Small details matter.
Map the workflow. Where do samples arrive, get prepared, and leave? Keep frequently used tools within easy reach, and separate clean work from splash-prone tasks where appropriate. Consider seated and standing work, storage, lighting, outlets, and whether staff need adjustable height. The U.S. Bureau of Labor Statistics reported 2.6 million nonfatal workplace injury and illness cases in private industry in 2023. That broad figure is not laboratory-specific, but it reinforces the value of considering ergonomics and daily handling early. Check the report’s scope before applying its numbers to your lab.
Write down requirements before comparing bench materials or layouts. Include cleaning methods, chemical exposure, load capacity, and future instruments. Ask the people who will use the bench to test a paper layout or mock-up. It may feel overly cautious. It can reveal awkward reaches that a floor plan hides. Some requirements will change once real work begins; record those uncertainties rather than pretending the first specification is perfect.

A lab workbench surface should match the chemicals and temperatures used at that station. Epoxy resin handles many acids and solvents, but prolonged exposure can still stain or damage it. Phenolic resin is often lighter and more affordable, though its chemical resistance varies by formulation. Check compatibility charts for the exact chemical, concentration, and contact time. “Resistant” does not mean immune.
Stainless steel suits clean areas and can tolerate substantial heat, but some acids and salts may corrode it. Ceramic surfaces resist heat well and clean easily, yet a dropped glass bottle can chip them. Laminate may work for general tasks, but hot vessels or aggressive chemicals can blister or weaken its finish. Small details matter. A warm flask set directly on a surface can leave damage before anyone notices.
Compare the workbench’s stated temperature limit with real tasks, including brief spills and repeated heating. Ask whether the rating applies to continuous contact or only short exposure. A compatibility test on a hidden sample may help, but it cannot replace reliable technical data. Wipe up spills promptly, and inspect seams where liquids can collect. I would also reconsider a surface choice when procedures change; yesterday’s safe setup may not suit a new reagent.
| Tip | What to Assess | Suitable Surface Options | Chemical Resistance | Heat Resistance | Practical Selection Check |
|---|---|---|---|---|---|
| 1 | List the chemicals used in the workspace, including concentrations, contact time, and spill frequency. | Epoxy resin, phenolic resin, polypropylene, stainless steel, or ceramic tile, depending on the chemical mix. | Resistance varies by chemical and formulation. Polypropylene generally performs well with many acids and alkalis; stainless steel can be vulnerable to some acids and chlorides. | Depends on the surface material and the temperature and duration of exposure. | Check a chemical-resistance chart for each substance and concentration; do not rely on a general “chemical-resistant” label. |
| 2 | Match the surface to routine heat exposure, such as warm glassware, hot plates, or occasional hot objects. | Epoxy resin, ceramic tile, or stainless steel may suit higher-heat tasks; use protective pads where appropriate. | Heat can change how a surface responds to spills, so assess chemical and heat exposure together. | Ceramic tile and stainless steel tolerate high temperatures, but coatings, joints, and underlying supports may have lower limits. | Ask for the maximum continuous and intermittent service temperatures for the complete worktop assembly. |
| 3 | Consider epoxy resin when broad chemical resistance and a seamless surface are priorities. | Epoxy resin worktop | Often offers broad resistance to many laboratory chemicals, though performance is not universal and strong oxidizers or prolonged exposure may cause damage. | Typically suitable for moderate-to-high laboratory heat; the exact limit depends on the product and exposure duration. | Verify compatibility with the chemicals actually used and protect the surface from direct, prolonged contact with hot equipment. |
| 4 | Consider phenolic resin for a lighter worktop where moderate chemical and heat resistance is sufficient. | Phenolic resin worktop | Generally resists many common laboratory chemicals, but can be affected by certain solvents, strong acids, or prolonged exposure. | Usually handles moderate heat; allowable temperatures vary by construction and manufacturer. | Confirm suitability for the specific solvent list and avoid assuming it matches the heat performance of epoxy resin. |
| 5 | Choose polypropylene for applications involving frequent contact with compatible acids or alkalis. | Polypropylene worktop or sink components | Often has excellent resistance to many acids and alkalis, but compatibility with organic solvents and oxidizing chemicals must be checked. | Has a lower heat tolerance than ceramic tile or metal; hot objects can soften or deform it. | Check the chemical chart and temperature rating, especially around hot plates, heaters, and autoclave-related tasks. |
| 6 | Use stainless steel where durability, cleanability, and heat tolerance are important. | Stainless steel worktop | Resists many substances but may be attacked by hydrochloric acid, some other acids, or chloride-containing solutions. | Excellent tolerance of typical laboratory heat; nearby seals, coatings, and supports may still have limits. | Identify the steel grade and check compatibility with acids, salts, disinfectants, and cleaning products. |
| 7 | Consider ceramic tile for tasks involving very hot items or strong resistance to surface heat. | Ceramic tile worktop | The tile itself is generally resistant to many chemicals, but grout and joints may absorb or be damaged by spills. | Excellent heat tolerance; sudden temperature changes can still crack some tiles or joints. | Inspect grout quality, joint sealing, and repair options; avoid treating the surface as seamless. |
| 8 | Use high-pressure laminate only where chemical and heat exposure is limited. | High-pressure laminate worktop | Suitable for routine light-duty use, but prolonged contact with aggressive chemicals can stain, swell, or damage the surface. | Limited compared with epoxy, ceramic, or stainless steel; hot equipment can discolor or damage the laminate. | Review the chemical and heat limits and use spill trays or protective mats for higher-risk work. |
| 9 | Evaluate the whole workbench, not just the worktop material. | Any surface paired with a compatible frame, edge treatment, joints, and storage system | Edges, seams, adhesives, and cabinet finishes can be less resistant than the main work surface. | Heat can affect supports, coatings, and nearby equipment even when the worktop itself is heat-resistant. | Check load capacity, spill containment, edge details, under-bench materials, and installation requirements. |
| 10 | Prioritize cleanability, maintenance, and replacement needs alongside material resistance. | Seamless resin or metal surfaces for easy wiping; tile where localized repair is useful | Smooth, intact surfaces are generally easier to clean; scratches, cracks, and open joints can retain contamination. | Repeated heating and cooling may gradually stress some surfaces and joints. | Ask about approved cleaners, inspection frequency, repair methods, and expected service life for the intended use. |
Note: Resistance and temperature limits vary with formulation, thickness, concentration, contact time, and worktop construction. Confirm specifications with the supplier and test compatibility when exposure conditions are critical.
Measure the work, not just the room. A bench should leave clear paths for people, carts, and equipment doors. Check the largest instrument’s footprint, then allow space for cables and routine cleaning. A few extra centimeters can prevent a cramped setup. Too much depth, though, may push frequently used tools beyond easy reach.
Set the working height for the tasks and users. When standing, elbows should rest near the work surface without raised shoulders. For seated work, check knee clearance and whether a footrest is needed. Adjustable stools help, but they cannot fix every poor bench height. Try the setup with a notebook or instrument in place. Small details matter.
Storage should match what is used daily. Put gloves, notebooks, and small tools in reachable drawers; keep bulky supplies lower to reduce awkward lifting. Choose shelves that do not block lighting or create head-level obstacles. Consider whether drawers still open when nearby equipment is operating. I have seen plans look spacious on paper and feel crowded in practice. Recheck the layout after placing actual equipment, and leave one surface area clear for temporary work.
Check the stated load capacity before choosing a lab workbench. Add the weight of instruments, stored supplies, and anything likely to sit on the surface during routine work. A centrifuge or full reagent cabinet can create concentrated loads, not just an even spread across the bench. Ask whether the rating applies to the whole top or to a specific area. Leave a margin for future equipment. I still find this easy to underestimate.
Map utilities to the actual workflow. Note where outlets, data ports, sinks, gas connections, and emergency shutoffs need to sit, then confirm that cables and hoses will not cross walkways or block access. Keep wet work separated from electrical connections, and check that materials suit the chemicals and cleaning agents used in the lab. Small details matter. Review applicable safety standards and your facility’s requirements with qualified safety or facilities staff; a product description alone may not answer questions about anchoring, edge protection, or safe clearances. Record the selected load rating and utility locations so they can be checked during installation.
A lab workbench should handle daily loads, chemical splashes, and repeated cleaning without turning routine care into a repair cycle. Check the rated load, frame joints, edge seals, and surface resistance against the actual work planned. A chipped edge may look minor, but moisture and cleaning agents can work beneath the finish. Small details matter. Ask how often surfaces need resealing, which cleaners are suitable, and whether damaged components can be replaced individually.
Purchase price is only one part of ownership cost. Include installation, cleaning time, repairs, downtime, and eventual replacement in your comparison. The U.S. Department of Energy’s Operations & Maintenance Best Practices guide (2010) estimates that operation and maintenance can account for roughly 60–80% of a facility’s life-cycle costs. This is a facility-level benchmark, not a workbench forecast, but it shows why upkeep deserves attention. Compare options over the same service period, and record expected maintenance hours alongside quoted prices. A neat spreadsheet will not capture every spill or rushed repair; still, assumptions should be written down and checked with the people who use the bench.